There are several ways to to file for your leave:
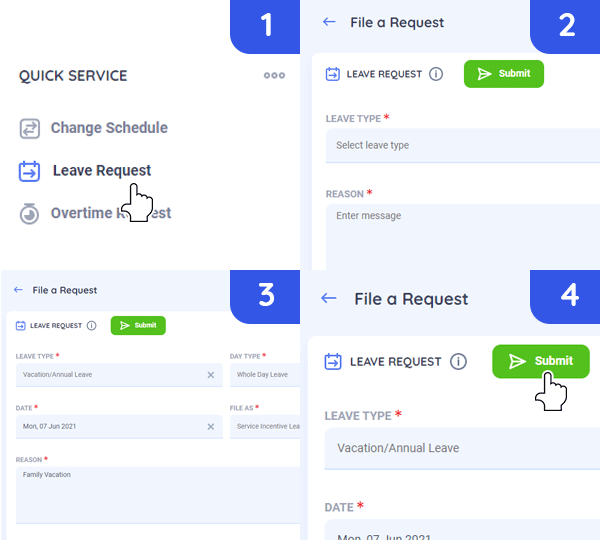
QUICK SERVICES
- On the Home page, go to Quick Services and click Leave Request.
- This will will redirect to a page where user needs to complete the Leave Request Form.
- Review the information provided.
- Click Submit and this request will be sent to your Manager for processing.
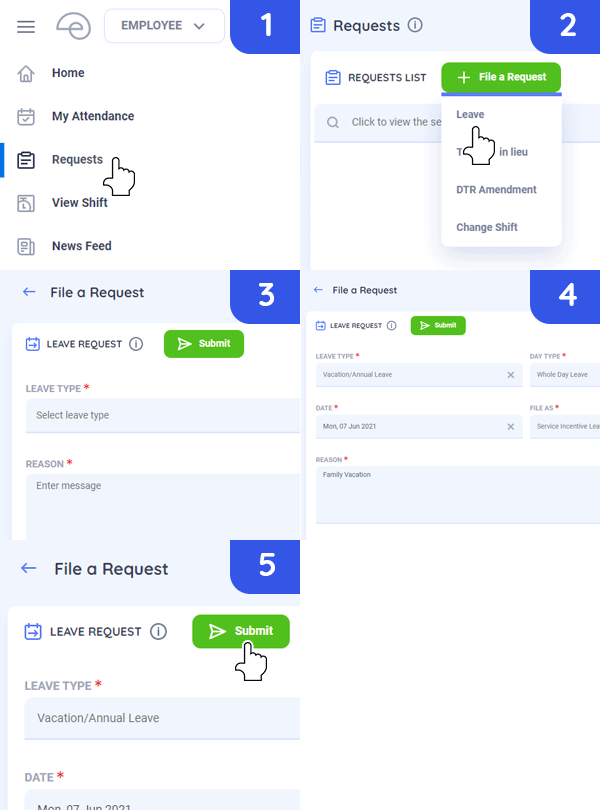
REQUEST PAGE
- On the Home page / Side bar, choose Requests.
- Click File a Request and choose Leave.
- This will will redirect to a page where user needs to complete the Leave Request Form.
- Review the information provided.
- Click Submit and this request will be sent to your Manager for processing.
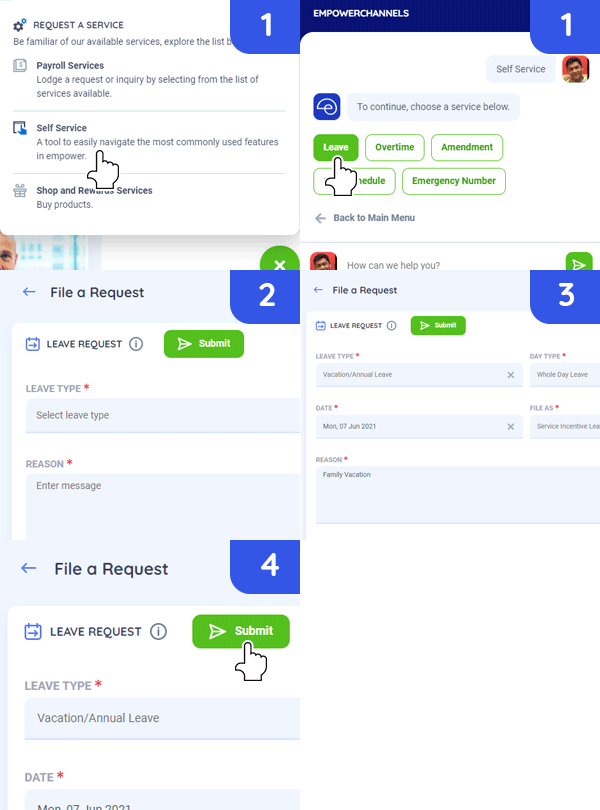
EXPRESS BUTTON
- On the Home page, click on the Express Button. Choose Self-service and click on Leave. This will redirect the user to complete the Leave Request Form.
- This will will redirect to a page where user needs to complete the Leave Request Form.
- Review the information provided.
- Click Submit and this request will be sent to your Manager for processing.
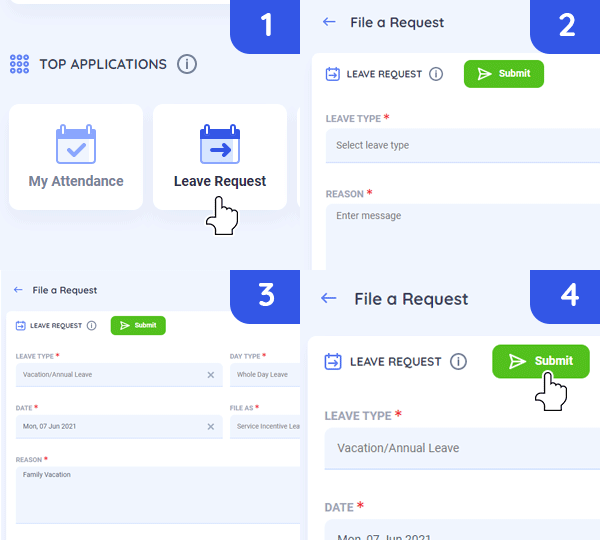
HOME PAGE - TOP APPLICATION
- On the Top Application, choose Leave Request.
- This will will redirect to a page where user needs to complete the Leave Request Form.
- Review the information provided.
- Click Submit and this request will be sent to your Manager for processing.
VIEW SHIFT
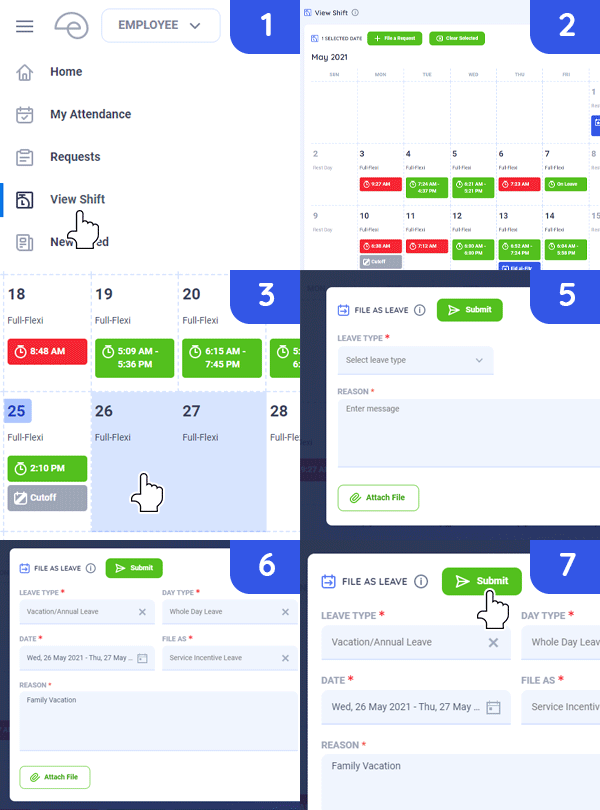
- On the Home page / Side bar, choose View Shift.
- This will will redirect to the View Shift Page, showing a calendar view of your attendance records.
- Click on a date or drag on a date range to choose the leave's effectivity date/s.
- On the belt menu (on top), choose File Leave.
- This will will redirect to a page where user needs to complete the Leave Request Form.
- Review the information provided.
- Click Submit and this request will be sent to your Manager for processing.
In cases that the Employee may not be able to file Leave due to emergency reasons, the Manager may do a pre-approved Leave on behalf of the employee.
Leave is filed for any past date within the pay cutoff on the end of the Manager.
Filing Leave on behalf of the employee:
FILING LEAVE ON BEHALF OF THE EMPLOYEE
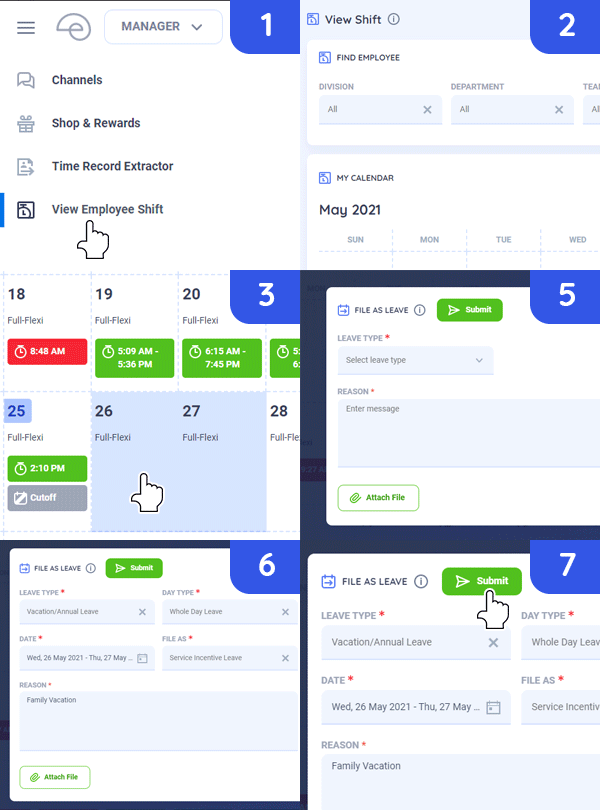
- On the Home page / Side bar, choose View Employee Shift.
- This will take you to the View Employee Shift page. Search for the employee for whom you want to request a leave of absence.
- Click on a date or drag on a date range to choose the leave's effectivity date/s.
- On the belt menu (on top), choose File Leave.
- This will will redirect to a page where user needs to complete the Leave Request Form.
- Review the information provided.
- Click Submit. Note that when a Manager is filing a leave on behalf of the employee, the transaction is considered as automatically approved.
Processing of Leave Request
A. REQUEST PAGE
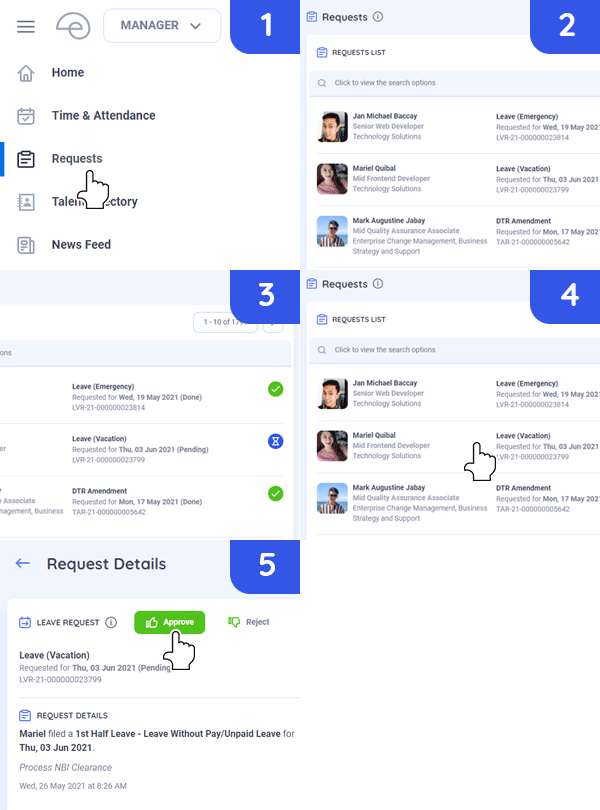
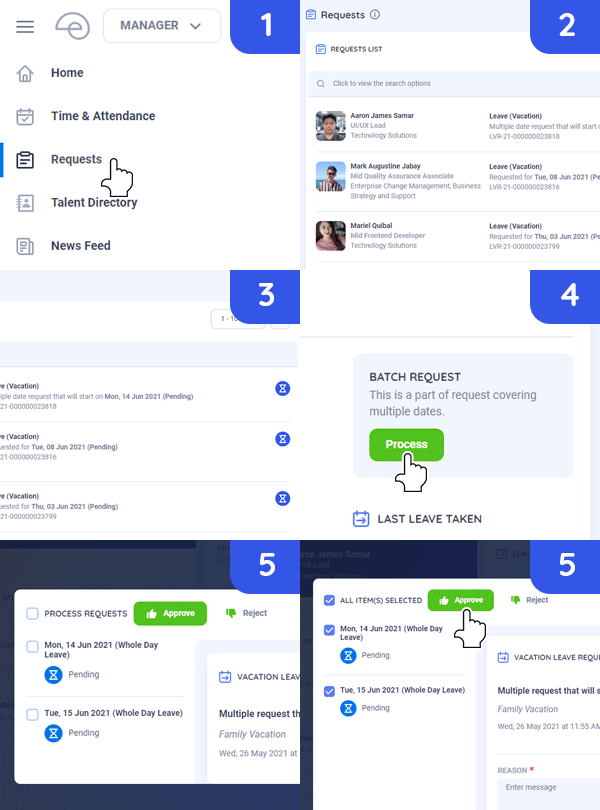
- On the Manager's view, click the side bar and choose Request.
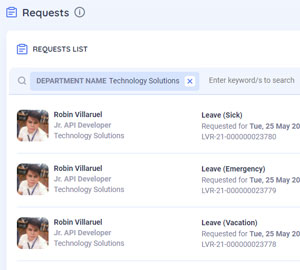
- This will be redirected to the consolidation page of all the Requests
- The request page displays an hour glass badges to help the Manager know what requests are waiting for approval.
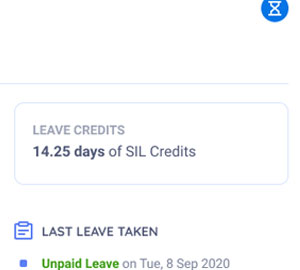
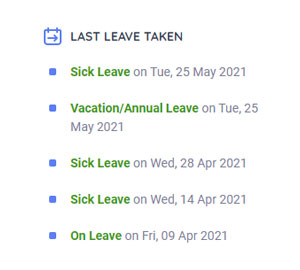
- To process, click a Request and this will proceed to the request's detail page where the Manager can review the information about the request.
- After reviewing, the Manager can process the request by clicking approve or reject on the belt menu.
B. STATISTICS
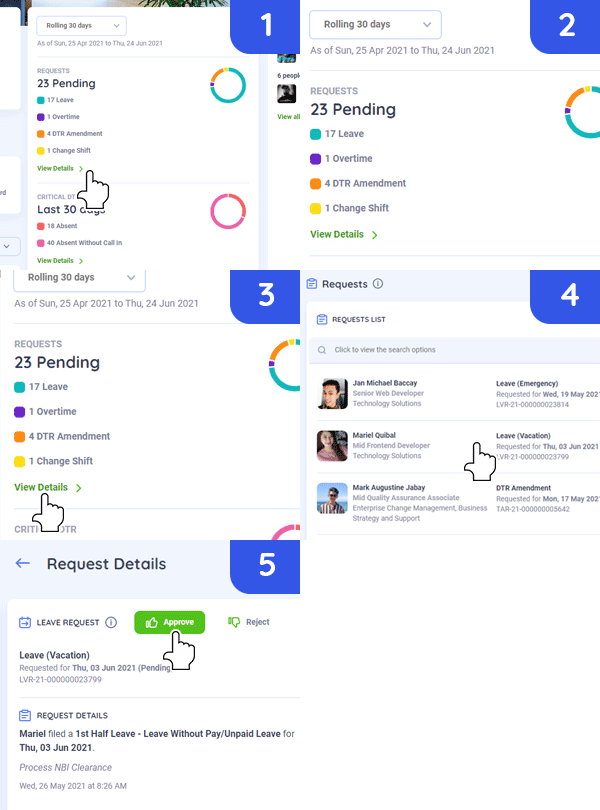
- On the Homepage, you will see Statistics section.
- You can see from this section if you have pending requests that needs to be processed.
- Click on View Details and this will redirect to the Request page.
- To process, click a Request and this will proceed to the request's detail page where the Manager can review the information about the request.
- After reviewing, the Manager can process the request by clicking approve or reject on the belt menu.
PROCESSING OF MULTIPLE REQUEST
- On the Manager's view, click the side bar and choose Request.
- This will be redirected to the consolidation page of all the Requests.
- The request page displays an hour glass badges to help the Manager know what requests are waiting for approval.
- To process multiple Requests, click on the request and this will proceed to the request's detail page. Click on Process button on the right panel.
- This will be redirected to a modal where you can see the various dates of the requests. You may process this individually or by batch.
- After reviewing, the Manager can process the request by clicking approve or reject on the belt menu.
